Magento Remove Compare Products
In Magento we can remove Compare Products block so easily from the home page. Just follow the steps given below to get rid of it from your home page and other pages.
1. In your magento store admin panel, Go to System-> Configuration and then select Design on the left side bar.
2. Check if your package is ‘default‘ or ‘somecustomethemename‘ . If its ‘default’ then go the following folder location
Youstoreroot/app/design/frontend/default/default/
In case of custom theme go to the following location
Youstoreroot/app/design/frontend/yourcustomtheme/default/
3. Create layout folder if its not there
4. Create a new layout file called “local.xml” inside layout folder
and place the code below into it and save it.
<?xml version="1.0"?>
<layout version="0.1.0">
<default>
<remove name="catalog.compare.sidebar"/>
</default>
</layout>
5. Go To System->cache management and refresh the cache types “Layouts”
and “Block HTML output“. We ‘re done with this.
6. After refreshing just reload your page and find “Compare Products” has been removed from the sidebar in all your magento pages.
Please ignore the instructions below , as its no more recommended and highly discouraged.

1. Go to yourStorename\app\design\frontend\base\default\layout
In this case its demostore\app\design\frontend\base\default\layout
and find the file “catalog.xml“.

2. We have to override this file by our default template. Create same directory structure what we had for catalog.xml inside base template.
Create Two folders named “template” and “layout” inside app/design/frontend/default/default

3. Copy the File “Catalog.xml” inside the layout folder what we have created inside the default folder.

4. Now open the catalog.xml file which we have copied just now inside default folder and comment out the code attached below which are inside the tag <reference name=”right”>.

FYI : Kindly use HTML comments <!– –>.
<!–
<block type=”catalog/product_compare_sidebar” before=”cart_sidebar” name=”catalog.compare.sidebar” template=”catalog/product/compare/sidebar.phtml”/>
–>
And also comment out the code given below in catalog.xml
<!–
<catalog_product_compare_index translate=”label”>
<label>Catalog Product Compare List</label> –>
<!– Mage_Catalog –>
<!– <reference name=”root”>
<action method=”setTemplate”><template>page/popup.phtml</template></action>
</reference>
<reference name=”head”>
<action method=”addJs”><script>scriptaculous/scriptaculous.js</script></action>
<action method=”addJs”><script>varien/product.js</script></action>
</reference>
<reference name=”content”>
<block type=”catalog/product_compare_list” name=”catalog.compare.list” template=”catalog/product/compare/list.phtml”/>
</reference>
</catalog_product_compare_index>
<customer_account_index>
<reference name=”right”>
<action method=”unsetChild”><name>catalog.compare.sidebar</name></action>
</reference>
</customer_account_index> –>
5. Go to Varien / Cache directory and delete the files or flush your cache from the Magento admin panel. Now refesh the browser and see the compare products block has been removed successfully from the home page.

Cheers ![]()
If you have appreciations, suggestions, difficulties or discrepancies with this kindly let me know through your comments.
Catch you with another useful Magento article
You may also like this
Magento – {{base_url}} is not recommended [RESOLVED]
{{base_url}} is not recommended to use in a production environment to declare the Base Unsecure URL / Base Secure URL. It is highly recommended to change this value in your Magento configuration.

After the fresh install of Magento we get this notification. Why we get this notification ? Its because we haven’t set up our base URL for both secure and unsecure and leave it as {{base_url}}.

Ok how do i get rid of this {{base_url}} is not recommended notification on my admin panel or what should i do to get rid of this {{base_url} is not recommended?
1. Go to System -> Configuration -> Web. Click on the tabs Unsecure and Secure And give your Home page url as a Base URL instead of {{base_url}}.
Eg :
If you are on a localhost give “http://localhost/demostore/”
else if you are on a production server hosted “http://yourdomain/” or “http://yourdomain.com/”
And don’t forget to add the forward slash / at the end of the URL.

2. Save you configuration and you can just find the
{{base_url}} notification has been removed from the Magento Admin Panel / back end.

By the Way, I also want to leave a note here if you have SSL installed on your server then use https:// instead of http://. If you don’t have SSL installed then use http:// for both secure and unsecure.
Hope this helps.
Cheers ![]()
If you have appreciations, suggestions, difficulties or discrepancies with this kindly let me know through your comments.
Catch you with another useful Magento article
You may also like this
Magento Remove Poll
In Magento we can easily remove the community poll. Lets see how to remove poll in Magento.
(For your information, you can just click on the images in this post or any of the posts in this blog to get opened in a new tab or window and you can maximize it / zoom it. All the images used in this post or any of the posts in this blog are high resolution images so that you can get a clear picture, If there are any discrepancies let me know through your comments )

1. Log in to Magento Admin Panel. Go to System -> Configuration. And click on Advanced on the Left side options. You will get a list of installed modules in magento.

2. Find the Module Mage_Poll and Select the option disabled from the drop down list next to that to remove or disable the community polls in Magento.

3. Save you configuration by clicking on “Save Config” button. Then flush your Magento cache or go to var/cache directory and remove all the files.
Refresh your Home page and see the community poll has been successfully removed from your Magento Home Page.

Cheers ![]()
If you have appreciations, suggestions, difficulties or discrepancies with this kindly let me know through your comments.
Catch you with another useful Magento article
You may also like this
Magento remove Paypal logo
Its very easy to remove Paypal logo from magento home page. Believe it or not its just takes 3 minutes to remove PayPal Logo.
to find how to easily remove the paypal logo from the admin panel with out modifying any of your layout or template or css files 😉
(For your information, you can just click on the images in this post or any of the posts in this blog to get opened in a new tab or window and you can maximize it / zoom it. All the images used in this post or any of the posts in this blog are high resolution images so that you can get a clear picture, If there are any discrepancies let me know through your comments )
![]()
1. Login to your Admin Panel of your Store. Go to System -> Configuration and click on ![]() from the options on the left side.
from the options on the left side.
![]()
2. Then you will get the whole settings of Paypal in your Magento Store. Click on the Tab “Front end Experience settings“.
![]()
3. Select “No Logo” from the drop down list of the PayPal Product Logo field.
![]()
4. We are done with this. Just save your configuration and flush your magento cache from the admin or go to var / cache directory and manually remove all the files. Then refresh your home page. You can find paypal logo is removed from magento home page.
![]()
For magento 1.7 users, Login in to admin panel and go to the following paypal configuration section mentioned below,
System->configuration->payment methods -> Paypal All in one payments solutions->
Paypal Payments Advanced (includes express checkout)-> Basic settings paypal payments advanced->
Frontend Expereince settings -> Paypal Product Logo
To ease your finding click on the image below which will open it in a new tab or window and click again the opened image to view it with clear and high resolution image.
Remove Paypal logo – in magento 1.7. C.E.
Cheers ![]()
If you have appreciations, suggestions, difficulties or discrepancies with this kindly let me know through your comments.
Catch you with another useful Magento article
You may also like these posts
Magento remove back to school
Many new Magento developers ask “how do I remove ‘Back to school‘ “. Some times its very frustrating for beginners.But its pretty easy to remove the back to school image from the Magento home page. Ok lets see it straight away How to remove back to school image from Magento home page. Most of the instructions are very similar to my another post.
1. In your magento store admin panel, Go to System-> Configuration and then select Design on the left side bar.
2. Check if your package is ‘default‘ or ‘somecustomethemename‘ . If its ‘default’ then go the following folder location
Youstoreroot/app/design/frontend/default/default/
In case of custom theme go to the following location
Youstoreroot/app/design/frontend/yourcustomtheme/default/
3. Create layout folder if its not there
4. Create a new layout file called “local.xml” inside layout folder
and place the code below into it and save it.
<?xml version="1.0"?>
<layout version="0.1.0">
<default>
<reference name="right">
<block type="core/template" name="right.permanent.callout" template="callouts/right_col.phtml">
<!-- <action method="setImgSrc"><src>images/media/col_right_callout.jpg</src></action>
<action method="setImgAlt" translate="alt" module="catalog"><alt>Keep your eyes open for our special Back to School items and save A LOT!</alt></action> -->
</block>
</reference>
</default>
</layout>
All i have done is Commented out the <action> nodes responsible to display this image “back to school”. Please use only HTML block comments <!– –>.
5. Go To System->cache management and refresh the cache types “Layouts”
and “Block HTML output“. We ‘re done with this.
6. After refreshing just reload your page and find your “BACK TO SCHOOL”
images has been removed from the right sidebar in all your magento pages.
If you want to remove it only from the specific pages then let me know, i can update my post.
By the way, Please ignore the following approach , which is no more recommended.
(For your information, you can just click on the images in this post or any of the posts in this blog to get opened in a new tab or window and you can maximize it / zoom it. All the images used in this post or any of the posts in this blog are high resolution images so that you can get a clear picture, If there are any discrepancies let me know through your comments )

1. Go to yourStorename\app\design\frontend\base\default\layout
In this case its demostore\app\design\frontend\base\default\layout
and find the file “catalog.xml“.

2. We have to override this file by our default template. Create same directory structure what we had for catalog.xml inside base template.
Create Two folders named “template” and “layout” inside app/design/frontend/default/default
3. Copy the File “Catalog.xml” inside the layout folder what we have created inside the default folder.
4. Now open the catalog.xml file which we have copied just now inside default folder and comment out the code attached below which are inside the <reference name=”right”>.

FYI : Kindly use HTML comments <!– –>.
<!–
<action method=“setImgSrc”><src>images/media/col_right_callout.jpg</src></action>
<action method=“setImgAlt” translate=“alt” module=“catalog”><alt>Keep your eyes open for our special Back to School items and save A LOT!</alt></action>
–>
5. Go to Varien / Cache directory and delete the files or flush your cache from the Magento admin panel. Now refesh the browser and see the back to school image has been removed successfully from the home page.

Cheers ![]()
If you have appreciations, suggestions, difficulties or discrepancies with this kindly let me know through your comments.
Catch you with another useful Magento article
You may also need this
Magento Remove Customer service
Its very easy to remove did you know customer service from the Magento Home page. Just follow the steps given below to remove it very easily.
(For your information, you can just click on the images in this post or any of the posts in this blog to get opened in a new tab or window and you can maximize it / zoom it. All the images used in this post or any of the posts in this blog are high resolution images so that you can get a clear picture, If there are any discrepancies let me know through your comments )
1. In your magento store admin panel, Go to System-> Configuration and then select Design on the left side bar.
2. Check if your package is ‘default‘ or ‘somecustomethemename‘ . If its ‘default’ then go the following folder location
Youstoreroot/app/design/frontend/default/default/
In case of custom theme go to the following location
Youstoreroot/app/design/frontend/yourcustomtheme/default/
3. Create layout folder if its not there
4. Create a new layout file called “local.xml” inside layout folder
and place the code below into it and save it.
<?xml version="1.0"?>
<layout version="0.1.0">
<default>
<reference name="left">
<block type="core/template" name="left.permanent.callout" template="callouts/left_col.phtml">
<!--   <action method="setImgSrc"><src>images/media/col_left_callout.jpg</src></action>
<action method="setImgAlt" translate="alt" module="catalog"><alt>Our customer service is available 24/7. Call us at (555) 555-0123.</alt></action>
<action method="setLinkUrl"><url>checkout/cart</url></action> -->
</block>
</reference>
</default>
</layout>
All i have done is Commented out the <action> nodes responsible to display the customer service image. Please use only HTML block comments <!– –>.
5. Go To System->cache management and refresh the cache types “Layouts”
and “Block HTML output“. We ‘re done with this.
6. After refreshing just reload your page and find your “Customer Service” image has been removed from the left sidebar in all your magento pages.
If you want to remove it only from the specific pages then let me know, i can update my post.
By the way, Please ignore the following approach , which is no more recommended.

1. Go to yourStorename\app\design\frontend\base\default\layout
In this case its demostore\app\design\frontend\base\default\layout
and find the file “catalog.xml“.
2. We have to override this file by our default template. Create same directory structure what we had for catalog.xml inside base template.
Create Two folders named “template” and “layout” inside app/design/frontend/default/default
3. Copy the File “Catalog.xml” inside the layout folder what we have created inside the default folder.
4. Now open the catalog.xml file which we have copied just now inside default folder and comment out the code attached below which are inside the tag <reference name=”left”>.

FYI : Kindly use HTML comments <!– –>.
<!–
<action method=“setImgSrc”><src>images/media/col_left_callout.jpg</src></action>
<action method=“setImgAlt” translate=“alt” module=“catalog”><alt>Our customer service is available 24/7. Call us at (555) 555-0123.</alt></action>
<action method=“setLinkUrl”><url>checkout/cart</url></action>
–>
5. Go to Varien / Cache directory and delete the files or flush your cache from the Magento admin panel. Now refesh the browser and see the Customer service did you know block has been removed successfully from the home page.

Cheers 🙂
If you have appreciations, suggestions, difficulties or discrepancies with this kindly let me know through your comments.
Catch you with another useful Magento article
You may also need this
Magento Email Templates
Magento has a great set of options to manage the Email Templates. Here we are going to see how to create our own Email templates for forgot password and how to change the magento default Email Templates and change the Email Sender options etc. Lets see it straight away.
(For your information, you can just click on the images in this post or any of the posts in this blog to get opened in a new tab or window and you can maximize it / zoom it. All the images used in this post or any of the posts in this blog are high resolution images so that you can get a clear picture, If there are any discrepancies let me know through your comments )
We are going to create a “New Forgot Password Template” and override the default forgot password template in just 8 easy steps.
1. Go to System -> Transactional Emails

2. You will get a new block called “Transactional Emails” with the list of email templates. By default you can find no one.

3. Click on “Add New Template” to create our own Email Template.

4. Choose the template “New Password” from the available list of options in the first drop down menu.

5. Choose your “Locale” or “Language settings“. In this case it is “English (United States)”. And here i want to leave a note. In case if you select German (Germany) and not able to see the german email template then it means you have to change your store configuration locale to German. After changing this you can get the “Deutsch (Deutschland)” and the email template for forgot password in german.

6. Now click on “Load Template” and you can see the template subject, template content and template styles. Make necessary changes to your template as you wish and give your template a name.
For example if you want to change the magento Email Logo. Just Copy your New Email Logo to the default skin\frontend\default\default\images location and replace the default magento logo ‘logo_email.gif‘ with your new email logo file name lets say ‘mystore_logo_email.png‘.
In this case “MyStore New Password” and preview the template if it looks good for you then go ahead and save the template as “mystore new password”.
 7. Its not over yet. So far we have created only a new email template for “forgot Password”. Still we have to assign this as the Forgot Email template instead of the default magento email template and change the email configurations. Lets see what we have to still to get our new email email template for forgot password.
Click on both the links “Configuration” and “Customer Configuration” to change the Magento Email settings.
At first let us see what we have to change in configuration.
Go to System -> Configuration -> Store Email Addresses and change the email addresses for the General, Customer support etc.

8. Then Go to System -> Configuration -> Customer Configuration. Click on the “Password Options” and assign our new email template “mystore new password” as an email template for forgot password. And we can also choose the Email Sender too from the drop down last for Forgot Password emails.

And save the Configuration. Now we are all set just click on the forgot password link in the customer login option on front end (Don’t try with the forgot password for magento admin panel because we have created a new email template only for Customer new password not for Admin New Password). Here we get our own Forgot / New Password Email with our own Logo in our own fashion and colours. Cheers 🙂 Hope this is clear. If you have any difficulties or discrepancies let me know through your comments.
Catch you with one another useful magento article.
Magento Admin login problem
(Please Note : This article is based on the magento’s latest release Magento ver. 1.4.1.0 at the time of this article written)
You may be irritated because of Magento just denying your access and not getting login to magento admin panel when running in localhost, though you provided the right username and password.
 Magento Admin Not Login
Ok How to fix Magento‘s Admin Login Problem . The fix is Pretty simple
a. web/unsecure/base_url as http://127.0.0.1/magento/
b. web/unsecure/base_url as http://127.0.0.1/magento/
(Kindly note : In this table there are 5 fields, what you need to do is find the fields named path and value. And replace the default value for the corresponding path fields mentioned above with your baseurl Http://127.0.0.1/magento/ ) You can also use any IP address instead of 127.0.0.1…
After this Just Locate the file varien.php found in
app\code\core\Mage\Core\Model\Session\Abstract\Varien.php
and copy the file inside the local folder
app\code\local\Mage\Core\Model\Session\Abstract\Varien.php
Create the same folder structure inside app / code / local before you copy varien.php
And find these lines
if (isset($cookieParams['domain'])) { $cookieParams['domain'] = $cookie->getDomain(); }
And replace with
if (isset($cookieParams['domain']) && !in_array("127.0.0.1", self::getValidatorData())) { $cookieParams['domain'] = $cookie->getDomain(); }
thatz all now you can login as an admin…
But don’t get satisfy with this fix just read the below lines why magento denied your admin access while you’re running in localhost….
Because Magento doesn’t create any cookie when you’re trying to login in your localhost, since its not a real domain….
Don’t forget to clear the cache (Its better to disable it for development environment)
![]()
First PHP Program
Now its time to code and run your first PHP program. We have learned how to install XAMPP on your environment in the previous article.
- So we have successfully installed xampp and now it’s time for PHP.
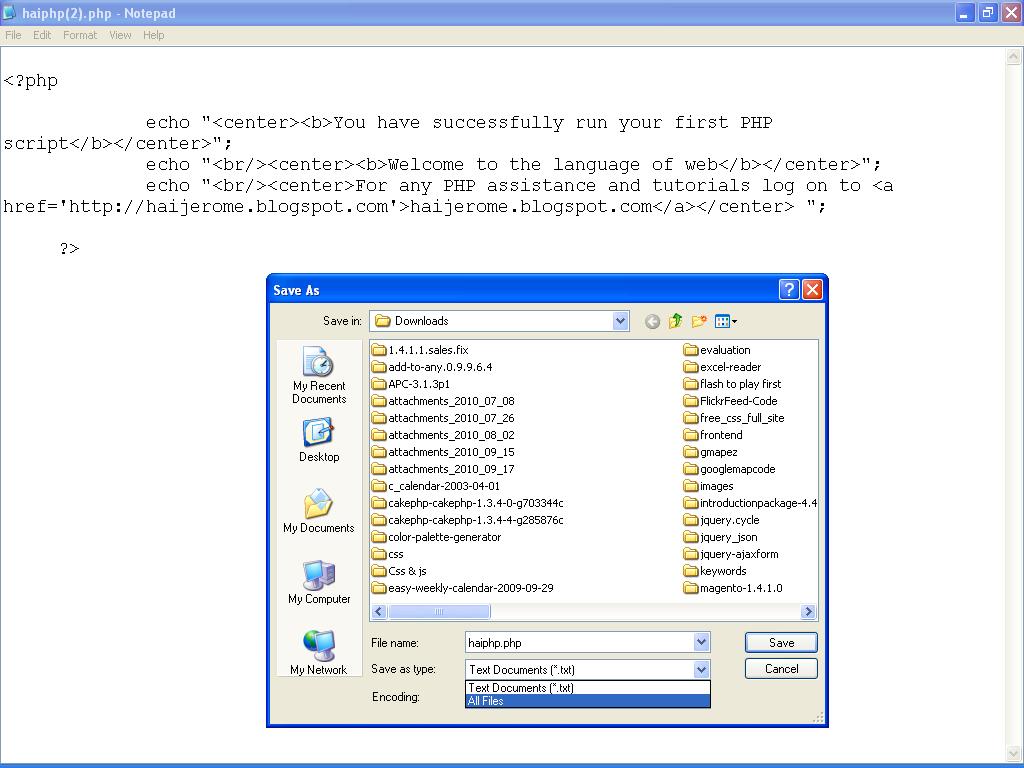
i. Open notepad and copy paste the following PHP code into it or just use the attached file and copy it in htdocs folder inside xampp (eg:c:\\xampp\htdocs\).
<?php

 echo "<center><b>Kudos !!! You have successfully run your first PHP scrip on Windows</b></center>";
 echo "<br/><center><b>Welcome to <h2>PHP</h2> the language of web</b></center>";
 echo "<br/><center>For any PHP queries Contact :<a href='http://www.experts-exchange.com/M_5168010.html'>haijerome</a></center> ";

?>
ii Save the file as “haiphp.php” into htdocs folder of xampp server (eg: c:\\xampp\htdocs\) and select save as type “All Files”.

If you don’t save your file type as ‘all files’ then you won’t get your PHP script running. Just because of this small issue, I have got a number of emails in my inbox and believe it or not, it forced me to write this article. And I have to thank this issue, because i have got a quite number of clients who turned into my friends later, all because of this little issue. So save you file type as ‘All Files’
And my kind suggestion is to use Notepad++ or if you want to be very professional then download Net Beans or buy Dream Weaver.
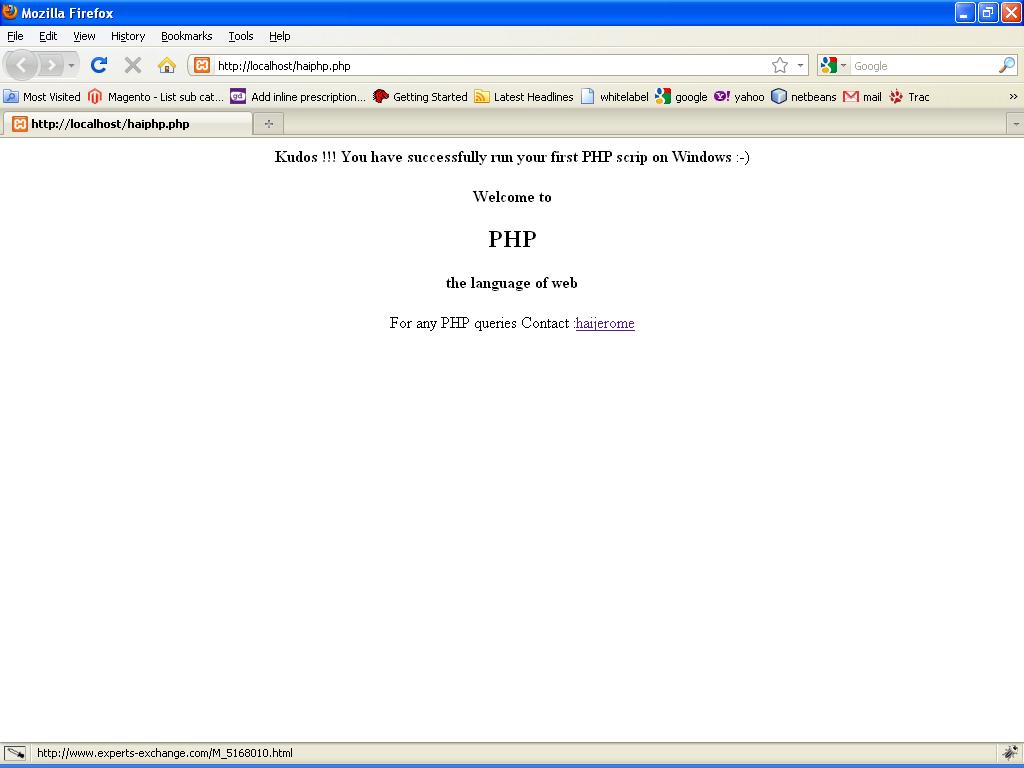
iii. Now type the url “http://localhost/haiphp.php” and see the PHP script running like a cake on your localhost web browser.
If you have followed the step ii of step 2 then type the URL like this http://localhost:81/haiphp.php assumed that your port number is 81. If not, give the port number that you have saved as listen port number in the httpd.conf file.

If you get any page not found or object not found or 404 error, then try with this http://localhost/xampp and conform whether you’re getting the xampp home page. If it displays the XAMPP home page then verify that you have saved your PHP file inside htdocs folder and the file name as haiphp.php and file type as ‘all files’.
If you don’t even get the xampp home page, then make sure Apache is running. Follow the article how to install xampp to get xampp or apache running on your localhost to resolve object not found or object not found error no : 404.
Installing Xampp

- Download XAMPP, an opensource package that holds Apache, PHP, MySQL, PERL (very old but powerful) which makes our work easier. Read more here (I mean the installation and configuration of PHP, Apache and MySQL on windows). Download XAMPP self extracting RAR archive .EXE file which in turn is an easy way rather than a zipped archive. Install it on your top level folder / directory of any drive Eg : C:\xampp or D:\xampp. The instructions on the XAMPP web page are very clear with good screenshots.
A few words about XAMPP ingredients,
Apache – A powerful and popular Web server to run server side scripts like PHP, ASP, JSP, CFML etc. Read More
PHP – A simple, flexible, powerful and easy to learn and get help server side scripting language with huge community support. Read More
MySQL – An open source RDBMS (database management system) with great set of features and very compatible with PHP. Read More
PERL – A 22 year-old powerful scripting language — perhaps a pioneer of PHP or server side scripting. A person with the basics of ‘C’ and ‘UNIX’ finds it easier to work with.Read More
- Now just open your folder where you have installed XAMPP and run the xampp control panel by running xampp-control.exe inside your xampp folder.
If you find the running… label highlighted in green color next to Apache and MySql then it is time to script your first PHP program, and our environment is ready. If not, just click the check boxes near to Apache and MySQL to install them as Windows services and click start button. (Wait for a while, don’t lose your temper — don’t click the start button again and again which you more likely to do as a beginner.)
At this point, some get struck — they find Apache / xampp not running on localhost even after this. Most of the times it is because the IIS (Microsoft’s web server) runs by default and occupied the HTTP port : 80, which Apache demands by default. There are two ways to resolve this.
The easy way:
Type services.msc in the run window. In other words Windows Key + R and type services.msc and click OK. Find the IIS admin in the list of services shown in the window below. If you find its status ‘started’ and startup type ‘automatic’ then right click on IIS admin and select Properties option in the pop up screen and stop the IIS service and change its startup type to disabled from the drop down list. And click OK. 
Now find Apache in the same list of services right click on it start the service and change its property as default start up type as ‘automatic’. Now click xampp-control.exe inside your xampp folder and start the MySql service. That’s all.OR…. the other way
The next way is to open ‘httpd.conf’ in the following location YOURDRIVE:\xampp\apache\conf. It is ia simple text file. Change ‘Listen 80’ to Listen 81 or Listen 8085 or the port number you wish (but don’t use the reserved port numbers).
- And restart your Apache and MySQL.
Note:
You can follow either of these two options as per your wish. I don’t recommend or insist that you choose only one of them rather than the other one.


Recent comments